Although I’ve got a great publisher for the e-book edition of Confessions of a Teenage Hermaphrodite, I decided to self-publish the paperback. Since I was already familiar with OpenOffice and unable to afford Adobe InDesign, I decided to invest some time to see if using OpenOffice was feasible.
The first step, always, is make a backup and put it somewhere you can’t mess it up.
Preliminary Cleanup
Editing always seems to inject typographic and formatting errors. So my first step was to insure that I didn’t have any tabs, double spaces, extra hard returns, or other debris in my file. What remained was the standard 12-point Times Roman, letter size, one inch margins, double-spaced document that we all use when we send a manuscript to an agent.
Paragraph Styles – Body Text
I use paragraph styles in my documents, but sometimes editing results in blocks of text that are ‘confused’ about their style. My first step, then was to re-assert a generic paragraph formatting everywhere.
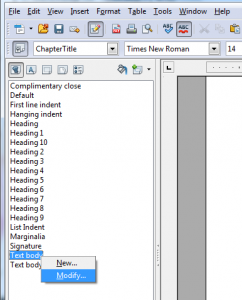
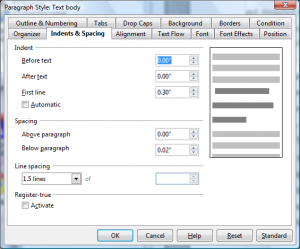
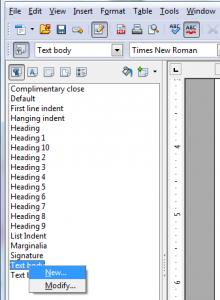
I checked the ‘Text body’ paragraph style to make sure the paragraph indent was set to a reasonable initial value. You can bring up the Styles and Formatting by selecting it in the Format menu or by pressing F11. Don’t use the formatting in the toolbar.
The paragraph indent is under the Indents & Spacing tab.
I also changed the text spacing to 1.5 lines for the time being.
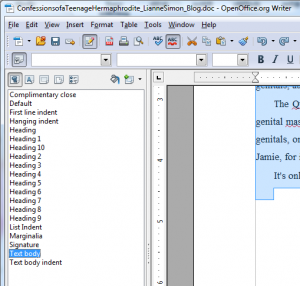
Since I use the ‘Text body’ paragraph style for my body text, I selected the entire document and applied the ‘Text body’ paragraph style by double-clicking on ‘Text body’ in the list of paragraph styles. Once again, don’t change the format using the toolbar. I hate this step because it removes all of the styling I did before sending the document off to agents.
Chapter Titles
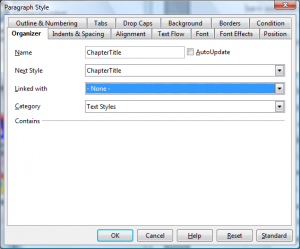
I created a new paragraph style called ‘ChapterTitle’ for my chapter titles.
Since I didn’t have an existing style similar to what I wanted, I used the ‘Text body’ paragraph style as a parent. Be sure to unlink the new style from the parent so that changes to the parent don’t mess up the chapter titles.
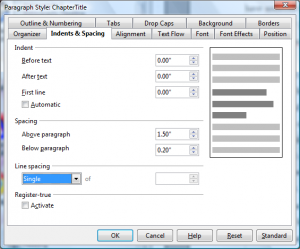
To begin with, I dropped the chapter titles down 1.5 inches on the page. This is where the drop is adjusted. Don’t use carriage returns. I also set the spacing below the title.
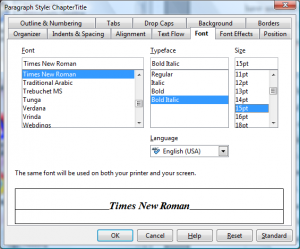
At this point we’re just establishing control over the format, not trying make things look pretty. I set the font larger and changed the Typeface to differentiate the titles from the body text. Under the Alignment tab, I changed the alignment to center.
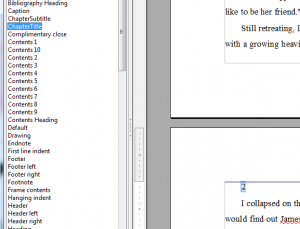
Once the new paragraph style was defined, I applied it to the chapter titles in the text. Select a chapter title and double-click on ‘ChapterTitle’ in the styles list to apply it. Don’t use the toolbar to change formats. Be sure the chapter title text is on its own line.
Scene Breaks
My scene breaks consisted of four asterisks separated by spaces, and centered. I created a paragraph style using ‘Text body’ as a parent, unlinked it, and set the alignment to center.
Rather than apply the new style to each scene break, I applied it to the first one and then copied it and pasted it over all of the others.
Character Styles – Drop Caps
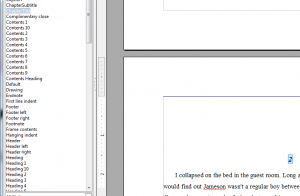
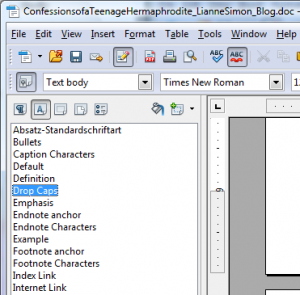
Since I wanted to eventually do something with the first character of each chapter, I modified the Drop Caps character style.
After I changed the font size, I selected the first character of the first chapter and applied the Drop Caps character style to it. It’s tedious, but I repeated the same process for each chapter.
Page Styles
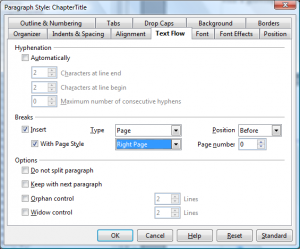
You’ve probably noticed that chapters always begin on the right side page. In order to accomplish this, I modified the Chapter Titles paragraph style. Under the Text Flow tab, I told OpenOffice to insert a Page break before the Chapter Title using the Right Page page style.
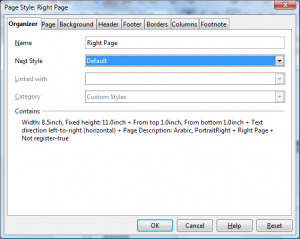
Then I modified the Right Page page style to make sure that a Right Page is followed by a Default style page. So, the first page of each chapter is a Right Page and all the following pages in the chapter are Default page style.
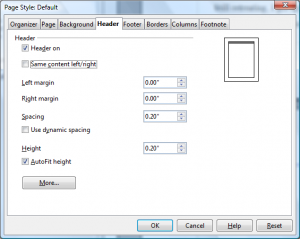
The first page of a chapter is different from the rest, but the odd and even numbered Default style pages will also be different from each other. I changed the Default page style to support this. Under the Page tab, I changed the page layout to Mirrored. Under the Header tab, I enabled headers and unchecked the ‘Same content left/right’ selection.
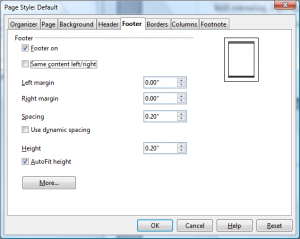
The footers are set up the same way.
If I wanted a header or a footer on the first page of each chapter, I’d need to enable the header/footer in the ‘Right Page’ page style.
Setting Page One
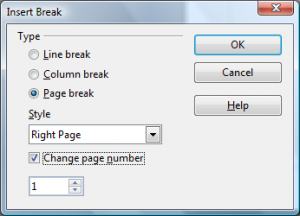
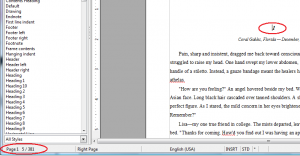
My document has several pages of front matter that I haven’t formatted yet. Since I want Chapter One to start on page one, regardless of what’s in front of it, I needed to set the page number. To do this, I placed the cursor just before the chapter title. For me, that’s at the end of the last line on the book’s second title page. I selected the Insert and Manual Break menu item.
Since the Chapter Title paragraph style was already inserting a page break, I immediately deleted the extra one by pressing the forward delete key (not the backspace). So now, the first page of Chapter One is one.
Headers and Footers
Once the pages were numbered properly, I inserted my header and footer text. Initially, I wanted to go with author name at the top outside of the left-hand page, the book title at the top outside of the right-hand page, and page number on the outside of each page (except the first page of each chapter).
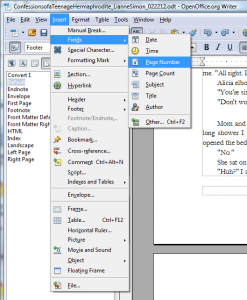
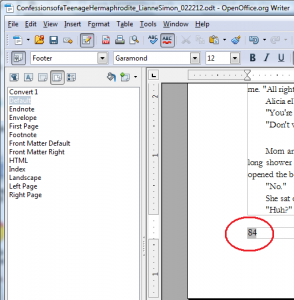
With the cursor in the footer of one of the pages, I inserted a page number field.
The page number turned out to be even, so left-justified would put it at the outside of the page.
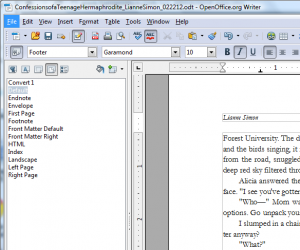
I scrolled up to the top of page 84 and typed in the author name. Even page, so it would be on the outside.
On the next page, I inserted the page number field into the footer and right justified it. In the header, I inserted the title and right justified it.
Front Matter
Since some of the front matter pages should be on the right when you open the book, I created a FrontMatterRight page style. I could have used the ‘Right Page’ page style, but I didn’t want headers or footers in my front matter. I created a FrontMatterDefault page style to use with it. I also created a FrontMatterSection paragraph style similar to the ChapterTitle paragraph style. I did a paragraph style for the copyright page. The only time I used the toolbar for formatting was the title page.
Page Size and Margins
I haven’t done much artistic design yet, but the document is set up to easily control the visual elements in a consistent manner. In Part 2, I’ll start formatting the document for a particular book size.
Get an Editorial Review | Get Amazon Sales & Reviews | Get Edited | Get Beta Readers | Enter the SPR Book Awards | Other Marketing Services












You might want to try LibreOffice (http://www.libreoffice.org/) instead. This is a fork of OpenOffice with more active development and bug fixes. Long story, but when Oracle bought Sun they mismanaged it, and all the key developers moved to LibreOffice. Freed of corporate oversight they were able to clean up years of backlogged bugs in a few months, so LibreOffice is now a far better product.
This is fabulous. Easy step by step with visuals. Thank you!
Totally agree that publishing ebooks today can be a DIY business. If you write for a specific audience, you can create a successful book without the help of big companies, and get your work into the hands of readers who can download ebooks from popular sites such as Amazon CreateSpace, Lulu, or Lightning Source. Thanks for this step-by-step guide.
Good tutorial! It’s nice to see more people giving open source software the community support love it deserves.
Is part 2 available yet? I can’t seem to find it.
Hi, check it out here: http://www.liannesimon.com/2012/03/01/formatting-your-book-with-openoffice-part-2/
Thanks so much!